The vast majority of residential solar systems are installed on the roof. This is obviously the perfect place to install solar panels, because of its height (hence with the least amount of shade) and because very often already provides a tilt. The solar panels are installed on rails; but how are rails attached to the roof?
Over the course of the last two decades, solar attachment manufacturers have been able to create (and offer warranty on) products that integrate perfectly with any roofing type and material. This has reduced to zero the risks of installation errors that were the main cause for damage and water leaks. In fact, most manufacturers and installers now offer up to a 25-year warranty on their products and workmanship!
 In a typical residential solar system, the solar panels are sitting on rails, and held in place by clamps. Each rail is connected to the roof’s rafters with attachments spaced 4 to 8 feet apart (the spacing depends on average wind speed, tilt of the roof, and rail strength).
The attachment consists of a lag screw that penetrates the roof rafter and holds to secure a piece of hardware (often called an ‘L-foot’) to which the rails are attached. The holes that are drilled into the rafters are sealed with an adhesion sealant (similar to a glue) that will not allow any water or humidity to penetrate the roof structure.
 These are the most common attachment techniques available today for each type of roof:
Shingle roof: this is the most common roof type, and two attachment methods are used:
Flashing: A ‘flashing’ element is tucked under the shingles, with an elevated water seal to protect water from seeping through the lag screw penetration.

 Pressure Seal: The attachment is placed over the shingles, and secured with a lag screw. Sealant is injected inside the attachment, so that it is completely waterproofed.
These are the most common attachment techniques available today for each type of roof:
Shingle roof: this is the most common roof type, and two attachment methods are used:
Flashing: A ‘flashing’ element is tucked under the shingles, with an elevated water seal to protect water from seeping through the lag screw penetration.
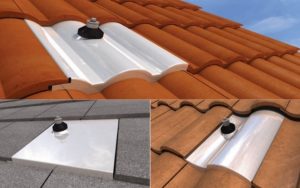
 Tiled roof: Usually, for each attachment the existing roof tile is removed and replaced with a mount attached to the roof with lag screws and sealant. A vertical post will provide the connection point to the rails. On top of the mount, a replacement tile will slip over the post and tuck under the existing roof tiles, providing flashing and additional waterproofing.
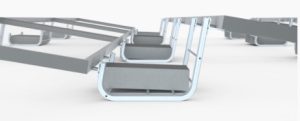
Flat roof: for low-profile systems where the roof can take additional weight, ballasted systems are the safest and cheapest install. A few attachments to the roof deck, mostly at the corners of the array, may be required to be added by the permitting authorities, especially in high wind and seismic areas. (Ex: Unirac Ballast)
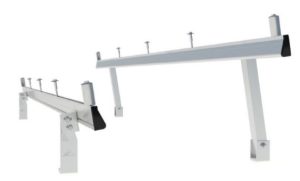
 For higher profile systems the tilt is created with vertical ‘tilt legs’, or posts of different heights. The vertical posts are attached to the roof deck with lag screws and sealant, and the rails are mounted on them, holding the solar panels at the desired angle. (Ex: IronRidge Tilt Mount)

